Posts

Showing posts from 2010

Fellowship of the 3rd Bench

Check this out... Fellowship of the 3rd Bench Made in Photoshop CS4.

Creating Anaglyph Images using Photoshop

Image
I had earlier posted about making use of Max-script for 3Ds max to generate an anaglyph stereoscopic 3D images using 2 simple images. Now this is easy but requires coding and a copy of 3Ds max and is sometimes very time consuming. A much simpler way is to use Photoshop. For this tutorial i will use the same images as in the previous example but you can use any images you like provided that they are recorded properly. Left Eye Image : Right Eye Image: Here are the steps for combining using Photoshop CS4 (will also work for most earlier and later versions). Step 1: Open both images in Photoshop. Step 2: Open and select the right eye image and under channels select green and blue channels(use Shift for multiple selection). Press CTRL+C to copy. Step 3: Open and select the left eye image and under channels select red channel .Press CTRL+V to paste. Step 4: Make sure the eye icon is turned on for all the channels. Step 5: Save left eye image as final image and...

Ferrari F430 with HDRI / How much of rendering Ogre-Rig take ?

Image
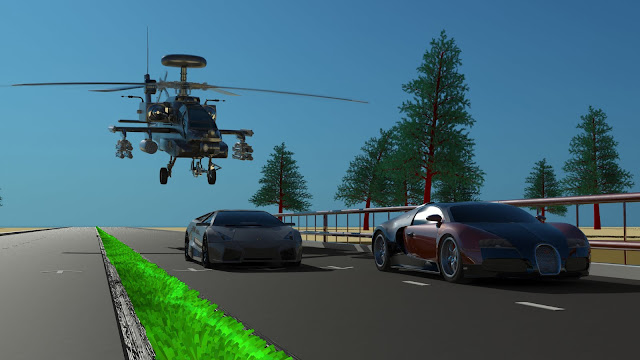
Just to clarify "Ogre-Rig" is not some wired space age monster that lives in the jungle and renders 3D images for fun it is just a normal computer that has been named so as it belongs to a friend Ogre (Mudit Gupta) . Moving on. Here i setup a scene using an earlier made model of a  Ferrari F430 . But this time instead of using a daylight system in 3Ds max i decided to use HDRI with Final Gather to light up the scene.I took me a bit of time to get the settings right and the shadow generation part was really annoying but i finally did it (Will post a tutorial soon explaining how to make your own HDRI image lighting with shadows and what exactly is HDRI ). Note: I downloaded the HDRI images from www.openfootage.net . The specifics of the scene are: Polygons : 202092 Lights : 5 (Ray Traced Shadows) , 1 HDRI Lighting system Image Resolution : 3840x2560 Renderer : Mental Ray 3Ds Max Version : 2011 Image Precision (Anti-aliasing) : High ( Min =1 , Max=16) Final Gather...

Nuclear Renderer - Logo

I was trying to make something cool using After Effects and was looking through the Video Copilot site which has some very nice and more importantly free tutorials for after effects.After searching through the entire collection of tutorials i decided to make the Green Smoke Tutorial . At that time we( Mudit , DJ and me) were also working on a college project for a 3D rendering program (will upload details when completed) so i decided to use the technique to make the logo for the project. So here it is: It took me about 30 mins to complete the entire thing. Here is the embedded video if you can't see it.

3Ds Max Reactor Cloth Simulation Tutorial

Image
A few weeks back i posted a series of reactor simulation videos in 3Ds max 2009. Here is a tutorial of how to make the cloth simulation. This is different from the other cloth simulation  tutorial i posted about 2 months back as this uses reactor the physics plugin on 3ds max. This will work for most older and newer versions of 3Ds max.

Ferrari F430

Image
Here are some renders of a Ferrari F430 model made and textured by me using 3Ds max 2009 with mental ray. Here is a video of the same model with the color transition done in After Effects CS3.

Game On - Prototype

Image
About a month back i posted about a project on controlling a pong game running on the computer with the help of a mobile phone (Samsung Wave S8500 - Bada OS) used for the paddles. Now we ( ankur and me) decided to take it to the next level and went on to make a generic game controller for any game running on the computer using android.The application name is " GAME ON " For this we make use of the phone's sensors and touch screen to generate different gestures and motion events; used these events to generate control data and sent the control data over a socket to the computer over a wireless network. Now using the received data (different for each motion event or gesture) the computer performs a certain task.

Space-Ship Shooting Test

Check out the video(in HD if possible .... Looks way better with the stars in the background). This is just a test and i will later be using the same technique for a more elaborate scene. Free plugins from http://lastjedioutpost.ru/ used

Motion Blur in 3Ds max

Image
Motion blur done in 3Ds max 2009. Effect Created by sampling the 3D scene 9 times at in a short span of time Motion blur with texture and with daylight system using MR-Sun A Video :

Cars + Apache

Image
My laptop could not handle the number of polygons in the scene with all the grass(Hair Modifier) with motion blur at the helicopter's rotor blades and kept on crashing so i made it in 3 different parts and joined together in Photoshop....Total rendering time 70 mins

Bugatti Veyron

Image

Pen Lazer

Made using free plugin from http://lastjedioutpost.ru/

Lamborghini Reventon Car Rig

A video of the new Lamborghini Reventon rigged up using the the toy car simulation in 3Ds max and rendered using mental ray. I made the car a while back and just used the same 3D model for this project. As the car was a very high polygon object i made a proxy mesh matching the car chassis and used that in the simulation instead of the entire car.After that i used the proxy object as a parent to the chassis and used that to drive the car. I also made use of the daylight system in mental ray for the lighting of the scene. Scene setup time : 1.5 Hours. Simulation time : 5 Minutes. Rendering time : 8 Hours.

Reactor Simulation

I was checking out the different kinds of simulations that can be done using 3Ds Max's reactor(havok) without the use of external plugins.Here are some of them (click on the links to watch): Rag-doll and Rigid-Body Simulation                 Took about 55 minutes to render using scanline.The model of the soldier is a downloaded one but i rigged it using the biped. Also all constraints for the rag-doll were done by hand and not using the script used here.The biped as well as the entire scene was made into a rigid body collection and simulated using reactor. Simulation time - 10 minutes. Soft-Body               To create the object as a soft body i added a reactorSoftBody modifier to it and then added it to the SBCollection.Then i made all the other objects as rigid bodies and simulated using reactor.Simulation time - 3minutes. Water    ...

Playing Pong on a Laptop Using Mobile Phones as Paddles

About a week back (while getting bored sitting in a java lab) me and Mudit were thinking of some simple project ideas to do over the weekend.So after some very wacky (when i say wacky i mean really over the top stupid) ideas we finally settled down on making pong but with a twist. We decided that instead of running it on one screen as it is usually done we will make the game area a lot larger buy using screens from various networked computers to make a very long but very awesome pong table.Next we decided to control the paddles not by using traditional keyboard keys but by making use of the accelerometer commonly available on most phones now-a-days.The idea was to control each paddle with separate phone by using the accelerometer on the phone to detect the motion of the phone and sending the data via a TCP socket over a wireless network to the computer running the game.

Character Animation

Character animation done in 3Ds max. Model of a soldier downloaded form the web. Rigged using biped and Physique Modifier.Applied some .bip (motion capture) files to it. Then and rendered it out in using mental ray with daylight system for shadows and lighting.

Mines in the ocean

Image
Found a really good tutorial on mental ray lighting system ( link ).I changed the Torus Knot with a few mines designed by me as they look a lot better. Here are my renders : Sunset: Night:

How much of rendering can HP 6515b take?

Image
I set up this scene of a few virus like things floating in 3Ds max, put on some textures on them and added some depth of field effects(9 passes) and rendered it out. The specifics of the scene are: Faces:5566720 Lights: 6 (Ray Traced Shadows) Image Resolution: 1920x1080 Renderer: Default scanline 3Ds Max Version:2009

Simple Cloth Simulation Using 3Ds Max

Image
Cloth simulations is one of the coolest features of any 3D program.It is very simple to create basic cloth animations but it takes a lot of time to simulate cloth due to the huge amounts of processing power required.Here is a simple cloth simulation tutorial.

Lazer Logo Engraving Animantion

I saw this tutorial on how to make a logo engraving and decided to go ahead and make it. Here is the final result. The original tutorial site are here (for the engraving) and here(for the sparks).

Bugatti Veyron

Image
Bugatti Veyron - Fastest road legal car in the world. @ 407 kmph .  3D anaglyph (Red - Cyan)

Lamborgini Reventon

Image
Here are a few still of the model of Lamborghini Reventon that i created .. there is also a cloth covering the car .. this has been done using cloth simulation in 3ds Max 2009... Cloth Covering WireFrames Model - No Texture Model - With Texture Video - Music provided by my friend Akash Sharma Update: Here is the version with photometric lighting Update 2: Anaglyph Red-Cyan 3D image PS: Will be posting cloth simulation tutorial asap.....

Creating Anaglyph & CrossEyed 3D images using (MaxScript)

Image
Stereoscopy (also called stereoscopic or 3-D imaging) is any technique capable of recording three-dimensional visual information or creating the illusion of depth in an image. More info here. Now to create a 3D image we need two pictures - one for the left eye and one for the right eye. These two images must be of the same size (height x width). These two images can be obtained by either clicking 2 pictures form a camera (one representing the image for the left eye and one representing the right eye) or can be rendered in a 3D program such as 3Ds max or Maya by creating 2 cameras in them offset by about 2" (the average distance between the human eyes) . Left Eye Image: Right Eye Image: Now we can combine these images to get different types of 3D images . This can be done in various ways such using specialized programs available on the internet or using Photoshop but we will do the same using maxscript(F11 to open script editor).

MARS Bot Final Design

Image
Here are some pics of the 3D model of the M.A.R.S. Robot. The 3D model has details of all the mechanical components of the robot.... Specification Video :-

Ragdoll physics in 3Ds Max 2009

Image
For information on ragdolls click here. Here are a few ragdoll animantions i made using 3Ds max physics engine "Reactor" A simple ragdoll effect in 3ds Max can be done in 2 ways . One way is sit down design the ragdoll from scratch and then apply constraints to it. This although is much better when you need very precise ragdoll physics.Another way is to simply use a premade MaxScript.

Microphone

Image
Here is a 3D model of a microphone that i made. I used HDRI to get the proper lighting and turned on Final Gather and GI.Used Mental Ray as renderer.

Boeing 737

Image
I designed a 3D model of Boeing 737 using 3Ds max (it has landing gear and all). I was confused between a shot of it taking off or it being airborne. I decided to go with a shot of the plane in the air. I downloaded a pic of some clouds from the net. Set up camera and lights in 3ds max and rendered it at 1080p. So here it is:

Project M.A.R.S

Image
M.A.R.S or Moblie Adaptive Robotic System is a robotic platform being developed by me and a few friends. The original design for the robot was: Then after a few design changes we decided to keep the inner and outer tracks on the the same plane.Currently the chassis of the bot(an aluminum frame of 22" X 17" X 8.5") has been completed and rite now the gearbox is being designed. The  current layout plan for the robot is A few pics of the chassis are here:

Stargate Project (Update)

Finall the rendering is complete(it took a good 16hrs on a very decent i7 at 720p): Here is the video .... Check it out in HD.... Music is the Stargate SG1 Theme Metal Version

Stargate Project

Image
After watching loads of episodes(315 - 215 of SG1 and 100 of SGA) & movies(3) of the stargate series I decided to start designing a stargate in 3DS max. Then i made some sand and pyramids to go along with it and came up with this.. After that i decided to make the event horizon "kawoosh" effect.After working on that for about 5hrs i came up with this (Video still rendering) ... I could not do any more because i got bored and also my laptop overheated to a point where it left its physical state and now exists only as energy (LOL)