Simple Cloth Simulation Using 3Ds Max
Cloth simulations is one of the coolest features of any 3D program.It is very simple to create basic cloth animations but it takes a lot of time to simulate cloth due to the huge amounts of processing power required.Here is a simple cloth simulation tutorial.
Step 1: Create a sphere (Position(X,Y,Z)=(0.00,0.00,0.00),Radius=20)

Step 2: Create a plane (Position(X,Y,Z)=(0.00,0.00,40.00),Length=50,Width=50,Length Segments=50,Width Segments=50)

Step 3:Select the plane(Plane01) and go to the modifier stack and add cloth modifier to it

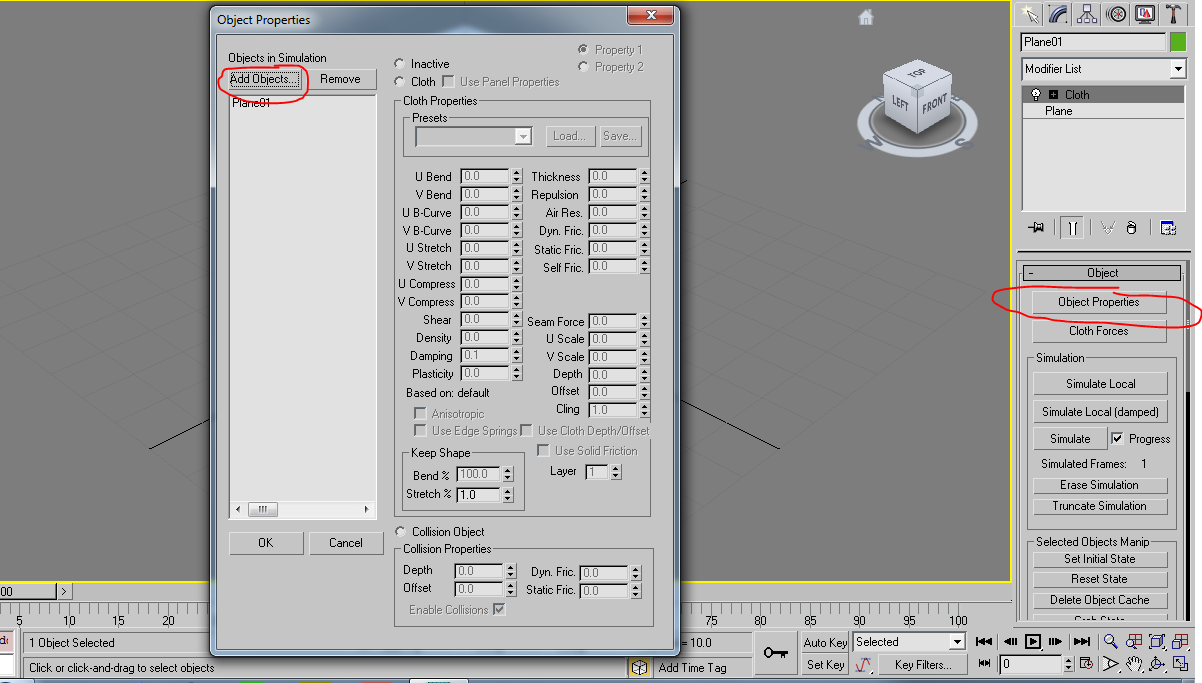
Step 4:Click on "Object Properties" and using the dialogue box add Sphere01 to the Objects in simulation list.

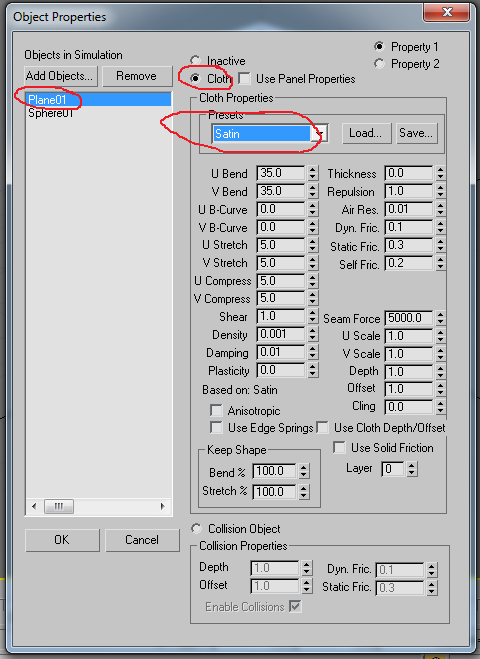
Step 5:Select Plane01 and Sphere01 one by one change their properties as shown in the screenshots below.Click OK


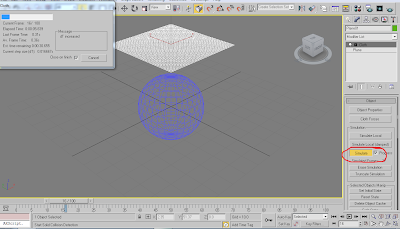
Step 6:Click on "Simulate" to start the simulation.Change parameters like gravity and end frame to get result.(I used -4000 for gravity [earth's gravity being -980] and 500 frames.)This will create key-frames for the cloth (in this care Plane01) falling on the sphere and colliding.This has to be done only once and will take time depending on your system config.
Step 7:Put some materials and render out the result.

Note:You can increase the length and width segments to make it cloth smoother and more realistic but this will make the simulation process slower.
I used this same technique for this picture of the cloth covering a car.The cloth was a plane with 300 length segments and 400 width segments. The car and the ground were collision objects.

Step 1: Create a sphere (Position(X,Y,Z)=(0.00,0.00,0.00),Radius=20)

Step 2: Create a plane (Position(X,Y,Z)=(0.00,0.00,40.00),Length=50,Width=50,Length Segments=50,Width Segments=50)

Step 3:Select the plane(Plane01) and go to the modifier stack and add cloth modifier to it

Step 4:Click on "Object Properties" and using the dialogue box add Sphere01 to the Objects in simulation list.
Step 5:Select Plane01 and Sphere01 one by one change their properties as shown in the screenshots below.Click OK

Step 6:Click on "Simulate" to start the simulation.Change parameters like gravity and end frame to get result.(I used -4000 for gravity [earth's gravity being -980] and 500 frames.)This will create key-frames for the cloth (in this care Plane01) falling on the sphere and colliding.This has to be done only once and will take time depending on your system config.

Step 7:Put some materials and render out the result.

Note:You can increase the length and width segments to make it cloth smoother and more realistic but this will make the simulation process slower.
I used this same technique for this picture of the cloth covering a car.The cloth was a plane with 300 length segments and 400 width segments. The car and the ground were collision objects.


Comments
Post a Comment