Posts

Showing posts with the label Tutorial

Photoshop - Human Cloning Project

Image
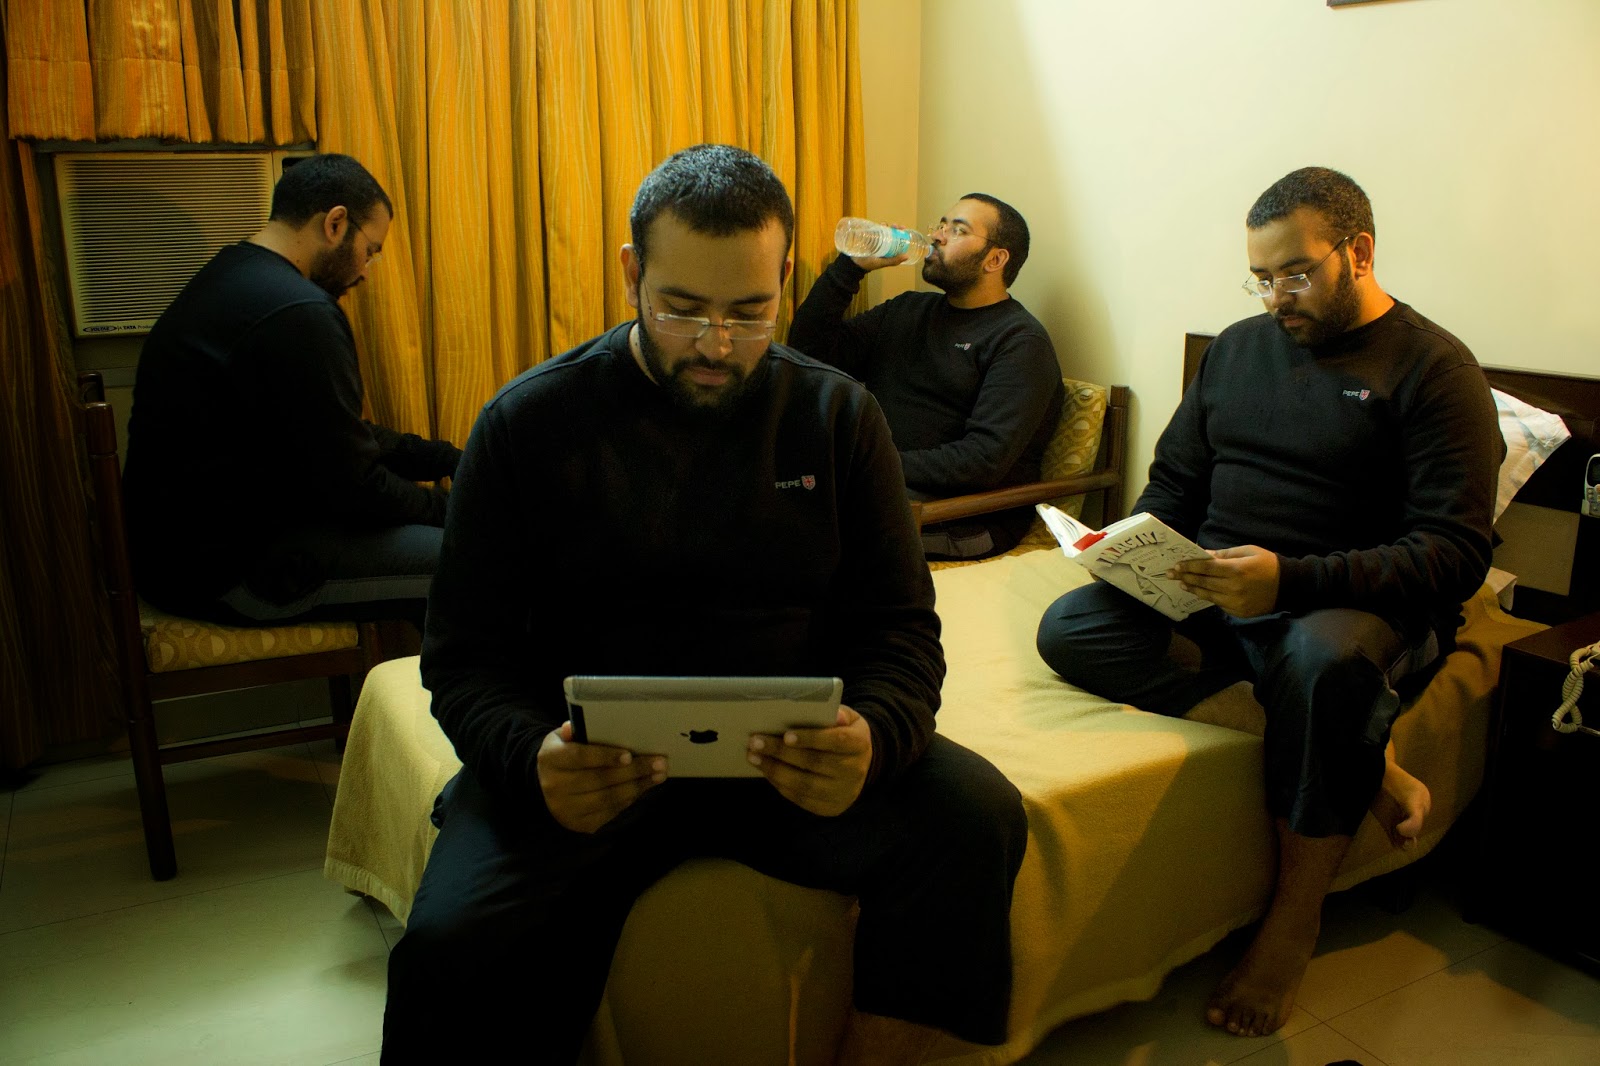
A few days ago I posted this picture of myself on facebook Loads of people asked me how I did this so I decided to make step-by-step a tutorial. It is ridiculously easy. I was going to do a video on this but then decided against it as it would have taken a lot longer and currently I don't have that much time at hand. I'm quite busy with the work @  Mistri Labs Step 1: Setup your camera. You will need camera where you can set exposure manually (Aperture Priority and Shutter Priority will not work too well in this case as the light will vary was the subject moves in the frame). Most P&S and DSLRs have this feature. Even a decent phone camera should work (You might need to download an extra app to set the manual exposure on your phone). You will need a tripod (or any surface that you can place your cam on if you don't have a tripod). - Setup the ISO - Don't use auto because the light changes as you move around the room. - Setup the aperture - For all the p...

Macro Shots with a Canon 600D

Image
I recently bought a a Lens Reversal Ring   for my DSLR. It is a pretty nifty gadget available at dirt cheap prices. The way it works is you screw it on the filter thread of your lens and then mount the whole lens to your camera in a reverse orientation. What this essentially does is it converts your lens into a macro lens lens (You can focus on things that are super close to your lens). Obviously there are some disadvantages to this approach rather than getting a proper macro lens. Firstly as your lens is mounted in reverse you don't have any control over the electronics (So auto-focus). Secondly, in case of canon lenses (in Nikon it closes down) the lens opens up the widest aperture (with no control) which can be a problem some times as you get a really shallow DOF which causes issues sometimes. For the second issue there is a workaround and it works (well sort of - alteast on Canon 600D and other similar cameras). Lets say you want to click a pic with an aperture...

Creating Anaglyph Images using Photoshop

Image
I had earlier posted about making use of Max-script for 3Ds max to generate an anaglyph stereoscopic 3D images using 2 simple images. Now this is easy but requires coding and a copy of 3Ds max and is sometimes very time consuming. A much simpler way is to use Photoshop. For this tutorial i will use the same images as in the previous example but you can use any images you like provided that they are recorded properly. Left Eye Image : Right Eye Image: Here are the steps for combining using Photoshop CS4 (will also work for most earlier and later versions). Step 1: Open both images in Photoshop. Step 2: Open and select the right eye image and under channels select green and blue channels(use Shift for multiple selection). Press CTRL+C to copy. Step 3: Open and select the left eye image and under channels select red channel .Press CTRL+V to paste. Step 4: Make sure the eye icon is turned on for all the channels. Step 5: Save left eye image as final image and...

Simple Cloth Simulation Using 3Ds Max

Image
Cloth simulations is one of the coolest features of any 3D program.It is very simple to create basic cloth animations but it takes a lot of time to simulate cloth due to the huge amounts of processing power required.Here is a simple cloth simulation tutorial.

Lazer Logo Engraving Animantion

I saw this tutorial on how to make a logo engraving and decided to go ahead and make it. Here is the final result. The original tutorial site are here (for the engraving) and here(for the sparks).

Creating Anaglyph & CrossEyed 3D images using (MaxScript)

Image
Stereoscopy (also called stereoscopic or 3-D imaging) is any technique capable of recording three-dimensional visual information or creating the illusion of depth in an image. More info here. Now to create a 3D image we need two pictures - one for the left eye and one for the right eye. These two images must be of the same size (height x width). These two images can be obtained by either clicking 2 pictures form a camera (one representing the image for the left eye and one representing the right eye) or can be rendered in a 3D program such as 3Ds max or Maya by creating 2 cameras in them offset by about 2" (the average distance between the human eyes) . Left Eye Image: Right Eye Image: Now we can combine these images to get different types of 3D images . This can be done in various ways such using specialized programs available on the internet or using Photoshop but we will do the same using maxscript(F11 to open script editor).

Ragdoll physics in 3Ds Max 2009

Image
For information on ragdolls click here. Here are a few ragdoll animantions i made using 3Ds max physics engine "Reactor" A simple ragdoll effect in 3ds Max can be done in 2 ways . One way is sit down design the ragdoll from scratch and then apply constraints to it. This although is much better when you need very precise ragdoll physics.Another way is to simply use a premade MaxScript.