Quadrotor 2.0
Long story short, I crashed my previous quad (sadly i did not get any footage of that) and in moving from Bangalore to Nainital i damaged a few of the components (2 ESC's and a Motor) so I decided that instead of trying to repair the old quad i would just go ahead and build a new one with better components.
I will use the remaining components to build an RC boat that i plan to use for some other projects for MistriLabs.
I wanted to design my own frame and even purchased a Jigsaw so that I could make something more complicated that Quad 1.0. I went ahead an made some 3D mock-ups (will post the renders soon) of my idea(s) but alas I don't have the time to actually make such a complicated frame right now being quite busy with the work for my start-up (Quad v3.0 hopefully).
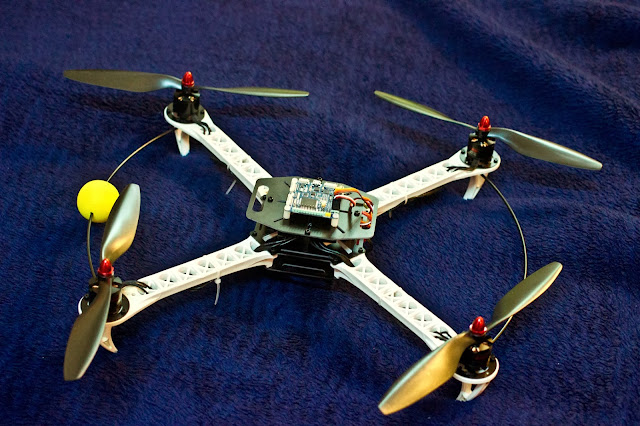
Anyway I order the components and assembled them for QUAD v2.0 (name suggestions welcome). The quad is in the "X" configuration with a yellow ball to indicate the front.
Component List:
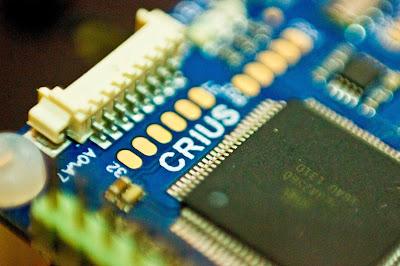
Flight Controller - Multiwii and Megapirate AIO Flight Controller w/FTDI (ATmega 2560) V2.0
Motors - EMAX Multi-copter Motor MT2213 Combo
ESC - Hobbywing Skywalker Quattro 20Ax4 UBEC Brushless ESC
Battery - Emax 2200mAh 20C 3S - Leftover from Quad 1.0
Radio - HK6S 2.4Ghz FHSS 6Ch Tx & Rx (Mode 2) - Leftover from Quad 1.0
Frame - Hobbyking SK450 Glass Fiber Quadcopter Frame 450mm
If you are buying this stuff in India most of it or something similar would be avaliabe at http://rchobbyaddict.com/
I shall be doing a detailed review of the Flight Controller (Short Review: It is freaking awesome) in an upcoming blog post.
Once the parts arrived it took me about 3-4 hours to assemble the whole thing and here are the pics.


 Lets just face it we have all done this when the batteries are charging.


Video of motor and ESC testing. Connected the ESCs directly to the radio (without the flight control board).
I will use the remaining components to build an RC boat that i plan to use for some other projects for MistriLabs.

I wanted to design my own frame and even purchased a Jigsaw so that I could make something more complicated that Quad 1.0. I went ahead an made some 3D mock-ups (will post the renders soon) of my idea(s) but alas I don't have the time to actually make such a complicated frame right now being quite busy with the work for my start-up (Quad v3.0 hopefully).
Anyway I order the components and assembled them for QUAD v2.0 (name suggestions welcome). The quad is in the "X" configuration with a yellow ball to indicate the front.
Component List:
Flight Controller - Multiwii and Megapirate AIO Flight Controller w/FTDI (ATmega 2560) V2.0
Motors - EMAX Multi-copter Motor MT2213 Combo
ESC - Hobbywing Skywalker Quattro 20Ax4 UBEC Brushless ESC
Battery - Emax 2200mAh 20C 3S - Leftover from Quad 1.0
Radio - HK6S 2.4Ghz FHSS 6Ch Tx & Rx (Mode 2) - Leftover from Quad 1.0
Frame - Hobbyking SK450 Glass Fiber Quadcopter Frame 450mm
If you are buying this stuff in India most of it or something similar would be avaliabe at http://rchobbyaddict.com/
I shall be doing a detailed review of the Flight Controller (Short Review: It is freaking awesome) in an upcoming blog post.
Once the parts arrived it took me about 3-4 hours to assemble the whole thing and here are the pics.

Assembled and Ready to go

The Motor

Landing Gear

Flight controller


Looks a lot less dangerous - Life does not flash before eyes

Quad ESC

Powered On

Armed


Shiny light
Video of motor and ESC testing. Connected the ESCs directly to the radio (without the flight control board).