DIY Polariscope
A few days ago I was stuck in one of those YouTube loops (happens once a month) and I came across this awesome video on the Prince Rupert's Drop by SmarterEveryDay (Excellent channel BTW). About 3:00 minutes into the video they use something called a Polariscope to check out the stresses built up inside the Prince Rupert's Drop. Watching that I realized that I had all the things needed to build this at home.
.jpg)
.jpg)
.jpg)
.jpg)
.jpg)
.jpg)
.jpg)
You need the following things for creating a Polariscope :
1) A polarized light source (White in color preferably) - Since almost all LCD's use polarized light to display images you could use your iPad or Laptop screen displaying a white image. I went for my 22" monitor as I needed a bigger surface.
2) A transparent object - Not all objects work well for this as some don't really have that much stress.
- Things that work well - Glass statues, use and throw forks and knives, glue sticks, etc.
- Things that don't work well - Soda bottles, plastic OHP sheets, Tupperware, etc.
3) A polarizer - A CPL (Circularly Polarizing) filter works best but you could also use those Throw-away 3D glasses you get at movies or your even your sunglasses.
4) A camera - DSLR works best but even a phone cam should work I guess.
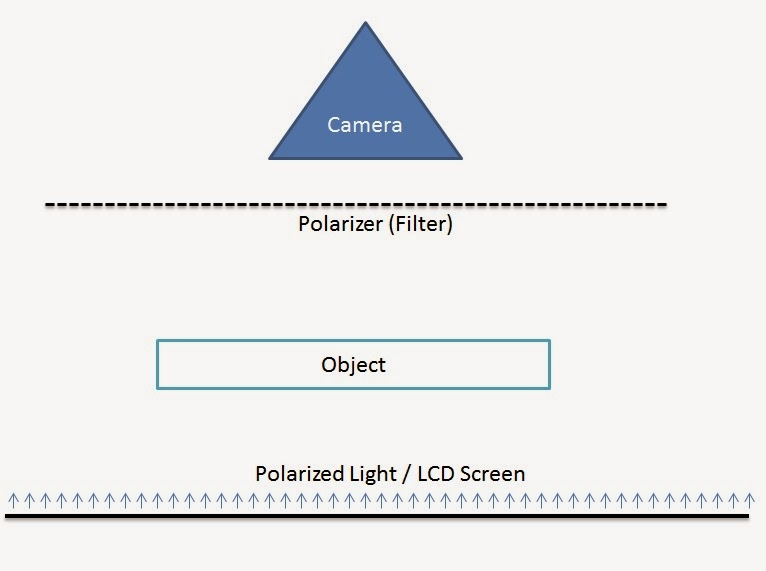
Setup the items as in the diagram and move around (rotate) the polarizer till the white light from the LCD becomes almost black. and you will see the stresses in the transparent object.
I tried out a few objects I had lying around and here are my results